Hawes Amplifier Archive by James T. Hawes, AA9DT
Car Reverbs


Art: Deluxe reverb unit by Lafayette Radio Electronics

Deluxe, under-dash reverb unit: Stereo Verb® with 3 controls: Mono/stereo, volume, balance. From Lafayette ($29.95).

How They Worked

What went on inside a car reverb?1,2 Some people think, “Oh, it used wire springs. The wire must have been a variable resistance.” Nope.

When a signal met the springs, the impact was mechanical, not electrical. In fact, no current passed through the spring. None. The important effect was that the spring wiggled proportionately to the input signal. Imagine a musician plucking a banjo string. Rippling down the string, the sound wave would eventually reach the banjo drum. In the case of the reverb tank, the radio became the “banjo player.” The spring tank was the “banjo.” And the reverb springs were the “banjo strings.”


Three Parts of Car Reverb

The secret of car reverb lay inside an electromechanical device.
It had three parts...

  • The exciter amplifier (car radio)

  • The spring tank, with one or more springs

  • The recovery amplifier

Art: Three blocks plus speaker; diagram of typical car reverb system

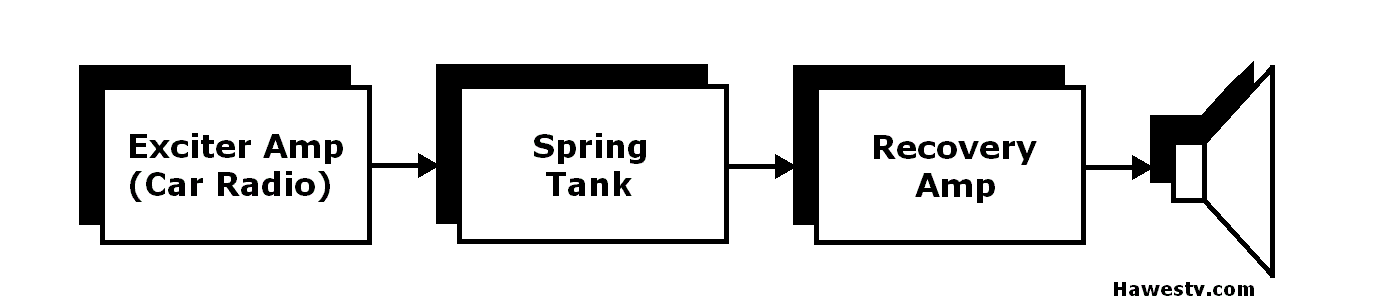
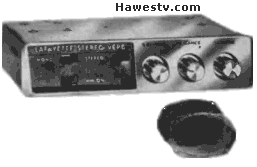
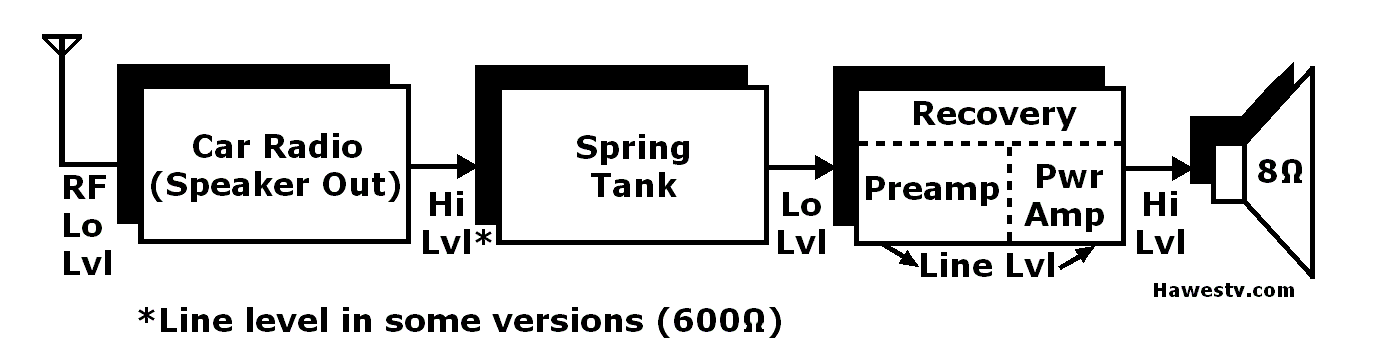
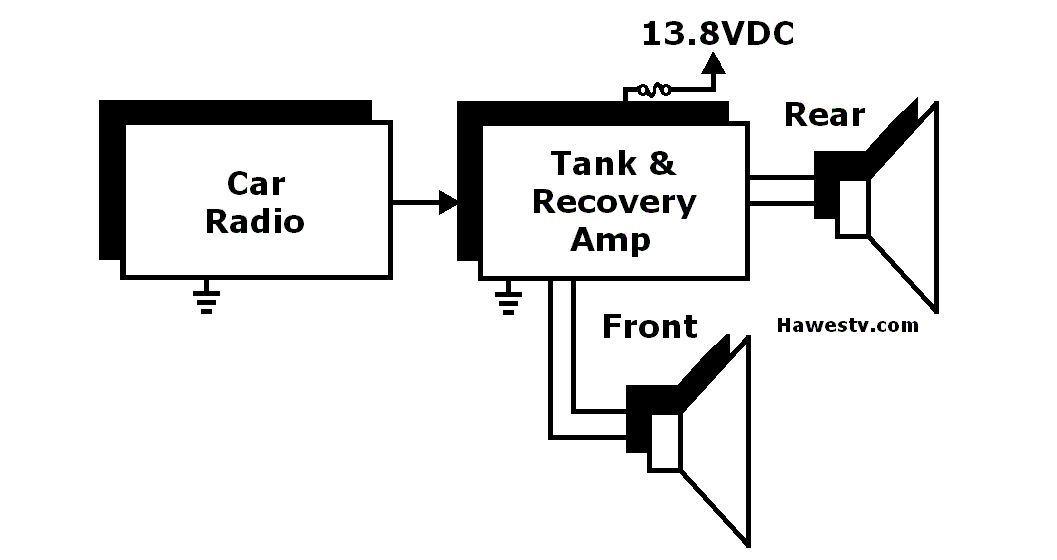
Typical car reverb system had three blocks, plus speaker.


Exciter Amplifier

In a classic car reverb unit, the car radio served as the exciter amp. The radio produced a varying electrical signal. The signal current was strong enough to energize the input transducer in the spring tank. (Engineers refer to such signals as high-level signals.)


Spring Tank

Still available. The original, three-inch Gibbs tanks for cars are unavailable. Yet Accutronics makes similar, miniature tanks: They're just 5¼" long. See: Mini-Tank.

Photo: Miniature spring tank 
       from Accu-Bell (Accutronics)

Accu-Bell Mini-tank #2BF2

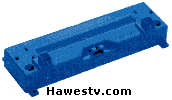
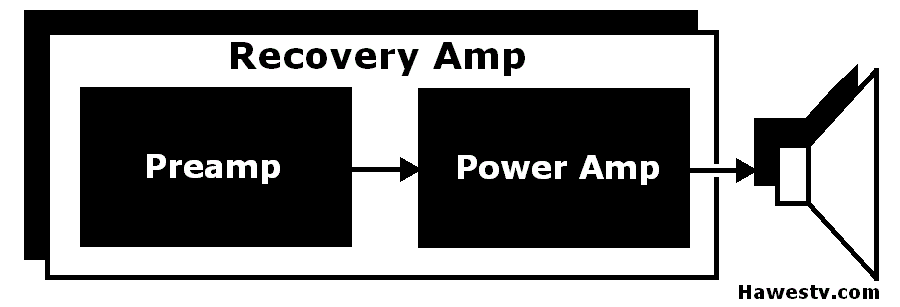
Tank operation. The tank was a box containing one to four springs. Each spring provided its own delay period. These springs looked like the extensor springs that close screen doors. The tank didn't stretch the springs, though. Instead, these were torsion springs: A transducer at the end of each spring twisted or untwisted the spring. That is, each input transducer was a micro-motor. Inside this motor, the audio signal varied a magnetic field that in turn moved a crank. Crank motion from each transducer twisted one spring.

Delay effect. The twist ran down the spring, a process which took time. The time interval was the delay period for that spring. The typical delay period for a car reverb was 33 milliseconds. (This period wasn't adjustable.)

At the other end of each spring was an output transducer. This transducer was a micro-generator. In this generator, the twisting spring turned another crank. The generator converted the spring's mechanical motion back into a varying electrical current.

Echo. A few sound waves rolled back to the start of the spring, bounced, and returned to the generator again. Here's where the reverb became an illusion generator: The listener perceived each bounce as an echo.


Tank Demonstration

The first minute and a half of the YouTube link (below) includes an animation of reverb spring action.


Recovery Amp

Preamp

The recovery amp was necessary because of signal losses in the spring tank. At the tank output, the signal strength was weak. Also, the tank over-emphasized bass frequencies and attenuated (weakened) midrange frequencies. The tank obliterated most frequencies above the midrange. The preamp's RC filters accentuated midrange sound at 6 dB per octave. Below are the objectives of the preamp design.

  • Restore low-level, reverb audio to line level

  • Eliminate rumble frequencies, below 100 Hz

  • Roll off bass tones

  • Linearize midrange sound up to 3, 4 or 5 kHz

Art: Block diagram of 
 recovery amplifier

Block diagram of recovery amplifier


Power Amp

Speaker output. The preamp fed the reinforced signal to a small power amplifier. The power amplifier was a current multiplier. This circuit raised a line-level signal to a high-level signal. The fortified signal drove the rear speaker. To reduce distortion, a feedback loop applied negative feedback across the audio band.


Art: Block diagram:
 Signal levels in classic reverb circuitry

Signal levels varied.


Art: Block diagram:
 Signal levels in classic reverb circuitry

Wiring

Footnotes

  1. H.E. Meinema & H.H. Canfield, “Artificial Reverberation Apparatus,” U.S. Patent 2,982,819 filed October 13, 1958, and issued May 2, 1961. This patent describes and illustrates the electromechanics of reverb. The detail level is more thorough than in this brief article. The patent describes a spring mounting technique that predates the mounting methods that we have now. The rest of the patent pertains to current reverbs. This is the patent number that appears on the reverb tank in Allied reverb, Model #19B4102. See the next footnote.

  2. Howard W. Sams & Co., Inc., Photofact: Allied Model 19B4192 (Indianapolis, IN: Howard W. Sams & Co., Inc., 1969), 1.


Go to Page:   1   2   3   4   5   6   7   8   9   10   11   12   13   Next

Google Search
Web www.hawestv.com


♦ NOTICE. If you'd like to contribute ideas or suggestions, email me. Submitted ideas and suggestions become the property of Hawes Amplifier Archive. I try to mention the source of anything I use.


♦ NOTICE: FURTHER INFORMATION. The details that I have appear on these pages. As I learn more, I'll add more data. Please don't email me for more information.


♦ NOTICE. None of the reverb units on this page is for sale by me. You might find one on eBay, though.


♦ NOTICE: Repairs, Modifications. Buy a Sams PhotoFact (schematic) set on eBay. I don't have, nor do I provide schematics. I don't repair or modify reverb units.


Copyright © 2019 by James T. Hawes. All rights reserved.

•URL: http://www.hawestv.com/amp_projects/reverb/reverb_car04.htm
Webmaster: James T. Hawes
•Revision—June, 2019 •Page design tools: HTML, Notepad, Word, & Explorer


Contents